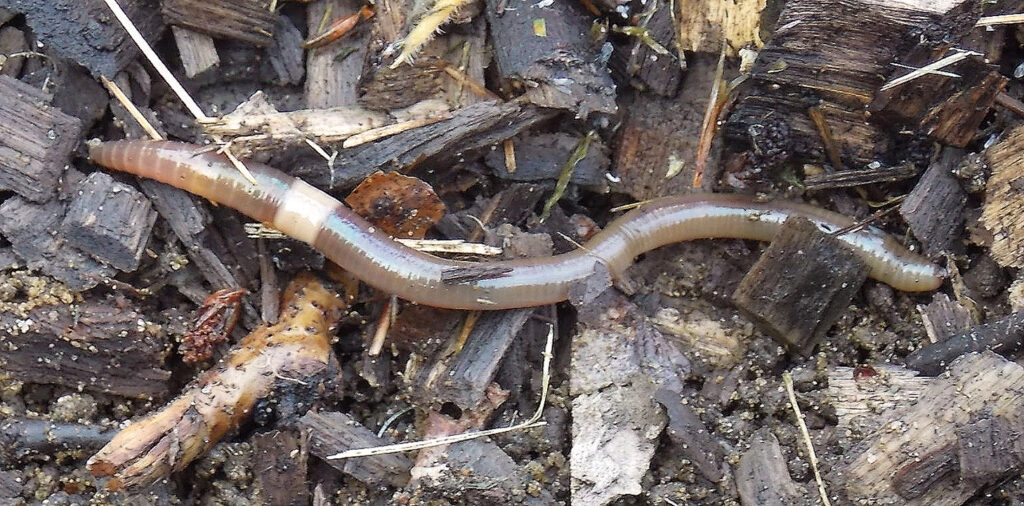
Crazy Snake Worm (Amynthas agrestis) in the wood mulch of a horticultural bed at a tree nursery in Vermont. Check out the white ring around the worm’s body. In Amynthas species it stretches all around the body and it is well offset from the rest of the body.
A new season of plant sales, swaps, and gardening means facing the jumping worm
problem.
Avoiding New Introductions
Here’s a compendium of broad guidelines from several university extensions and the Connecticut Agricultural Experiment Station (CAES) to help you deal responsibly with these invaders going forward. To avoid unwanted introductions, one should have a basic management protocol in place. The boxed links offer a deeper dive and can help those new to jumping worms catch up.
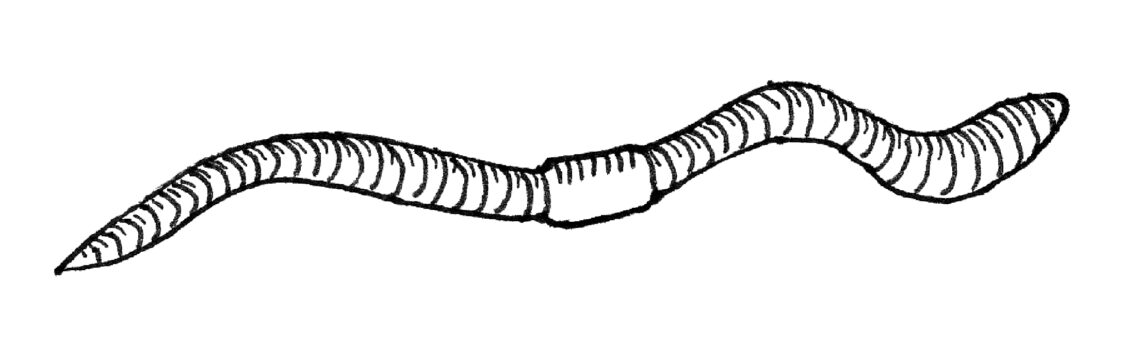
The enemy: Jumping worms (Amynthas spp.) are smooth, glossy brown or grayish and they move more like a snake than a ‘traditional’ earthworm. They hatch in April/May from eggs in protected cocoons laid in the fall, live near the top of the soil surface and in the leaf and mulch layer, and grow continuously until the soil freezes and kills the adults. Cocoons are tiny and hard to see with the naked eye. (See box below for info on further ID.)
If you don’t have them yet, do all you can to avoid bringing them in. If you have them, don’t share plants, tools, or equipment. Do not buy jumping worms for bait, vermicomposting, or gardens.
Basic facts: Research has found the cocoons can be killed at 105°F for 3 days, and in compost that has reached 140°F. No chemical has yet been identified that kills the eggs. Research is ongoing.
Accepting Plants for Sale/Swap
Only accept plants from gardeners who have screened for jumping worms, that aren’t sourced from an area known to have jumping worms, and if there is no evidence (like soil that resembles coffee grounds) to suspect there are jumping worms at the site that produced these plants/materials.
Preparation: Root Washing
When digging and dividing plants in the late winter or early spring ahead of a spring plant sale or swap, worms may not be present, but eggs could still be in the soil. When digging in fall, worms are easily spotted, and their eggs will be present.
Sell, swap, or buy bare-root plants when possible. To bare-root the plants, completely submerge plant roots in a container of water and wash away remaining soil to remove any cocoons, pests, or weeds. Be careful when re-moving soil as you might remove small root hairs that are the most active part of the roots. Plants in flower will be under more stress when transplanting. Once clean, protect roots for transportation and sale, or repot.
Prep: Actively Look for Worms
If worms are present: 1) Hand collect, seal in a bag, and dispose in the trash, or 2) Drown them in a bucket of soapy water, or bag and place in the hot sun for 10 minutes, then discard in the trash.
Caveat: Don’t throw what you think are dead worms back onto the property. Some may be stunned, recover, and continue to reproduce. If no container or bag is at hand, throw them into the center of a hot sunny driveway to kill them. If you put a jumping worm into a bucket without drowning it in soapy water, don’t assume it will stay there.
Controlling cocoons: Cocoons are about the size of soil particles and rinsing will reduce the probability of transferring the cocoons with the plants. Since rinse water may have cocoons, think ahead about how you’ll process/dispose of it. You could allow the water to evaporate, and then rinse the container with boiling water, or strain the water through several layers of cheese cloth or an old T-shirt and then bag the filtered matter for solarization or the trash.
Solarizing: Make a solarization package with a cheap clear plastic painter’s dropcloth. On any sunny day from May to September lay out 10-15 feet of plastic in a sunny location. Pile introduced compost, soil, mulch, or the washings from bare-rooting onto plastic sheet, keeping an even depth of 6-8 inches. Be sure the piled material doesn’t reach the edges of the plastic.
Lay a second sheet of plastic over the pile, leaving plenty of extra plastic beyond the size of the pile. Tuck the top sheet of plastic under the outer edges of the pile, then bring the bottom sheet edges up over the top sheet and secure with duct tape or small weights such as stones, trapping escaping worms. A package like this in full sun will reach temperatures of up to 150°F. Leave for three days. It may also kill some soil microorganisms, but they should recover quickly.
Repotting for Sale/Swap
For small numbers of repots, consider a soilless potting mix. For large scale production, be knowledgeable of the potting mix origination. The best way to ensure clean soil is to purchase bagged, weed and pathogen-free potting soil from a reputable dealer.
Use new pots if possible. This should assure that no cocoons exist. If using new pots is not possible, use cleaned pots (as free of soil as possible) that have been not used for at least two years, because it has been found that the cocoon protected eggs may remain viable for at least that amount of time.
Inspecting Organic Materials
Purchasing & Using Mulch and Compost: Be wary of homemade compost. Most does not reach the temperature required to kill the cocoons. Purchase materials from a reliable source. Avoid mulch, backyard compost, leaves, or other material that may harbor jumping worm eggs or weed seeds. Inspect mulch for signs of jumping worms. Consider waiting to add materials to the garden to determine if signs of jumping worms develop. Some gardeners leave bags of compost in the sun for several days.
Sending material from your yard to town/city facilities: Before bringing yard waste to city facilities, ask if the compost piles reach temperatures above 140°F and if they’re turning the compost on a schedule.
Storage/Holding & Preventing Contamination
Keep plants ready for sale/swap on surfaces like concrete, tarps, or trays where the newly potted plants won’t pick up contaminated soil, leaves, or mulch. Store potted plants off the soil to prevent jumping worms from getting into pots. Consider using pallets or structures to lift the pots up off the soil. If using a non-permeable fabric like plastic, keep pots away from the edges.
Caveat: Jumping worms are excellent climbers. Anecdotal reports describe jumping worms being found on the upper floors of buildings!
Sanitation: Thoroughly clean garden tools, shoes, and vehicles when moving from one site to another. Limit the movement of soil, mulch, compost, and plants from one site to another.
When selling or swapping, provide information to the buyers so they will use good practices to minimize the spread of the jumping worm. Research will continue to identify ways to control invasive earthworms.
– Anne Rowlands
Acknowledgments: Thanks to Judith King, Dr. Josef Görres, UMass Amherst, Nicole Kimmerle, University of New Hampshire, University of Minnesota, Connecticut Agricultural Experiment Station, Dr. Annise Dobson (Yale School of the Environment)
RESOURCES
A simple search for “root washing for jumping worm control” returns helpful .edu sites which will deliver you the most dependable and well-vetted advice. Here are some good resources:
• UNH Best Practices for Sales and Swaps: https://bit.ly/372SmAZ
• UNH more info: https://bit.ly/3qMXdxd
• Best Practices for Sharing Plants to Stop the Spread of Invasive Species: Nicole Kimmerle. https://bit.ly/3wQJRnC
• University of Minnesota Jumping Worms Project https://jwp.cfans.umn.edu
• CAES Jumping Worm in Connecticut fact sheet (Dr. Gale E. Ridge, updated March 2022): https://bit.ly/3u3HIDv
• Jumping Worm Update (Dr. Annise Dobson) from May 2020: conngardener.com/jumping-worm-update
• UMass has a good identification posting: https://bit.ly/3IW1OU0